¶ Travel Guide

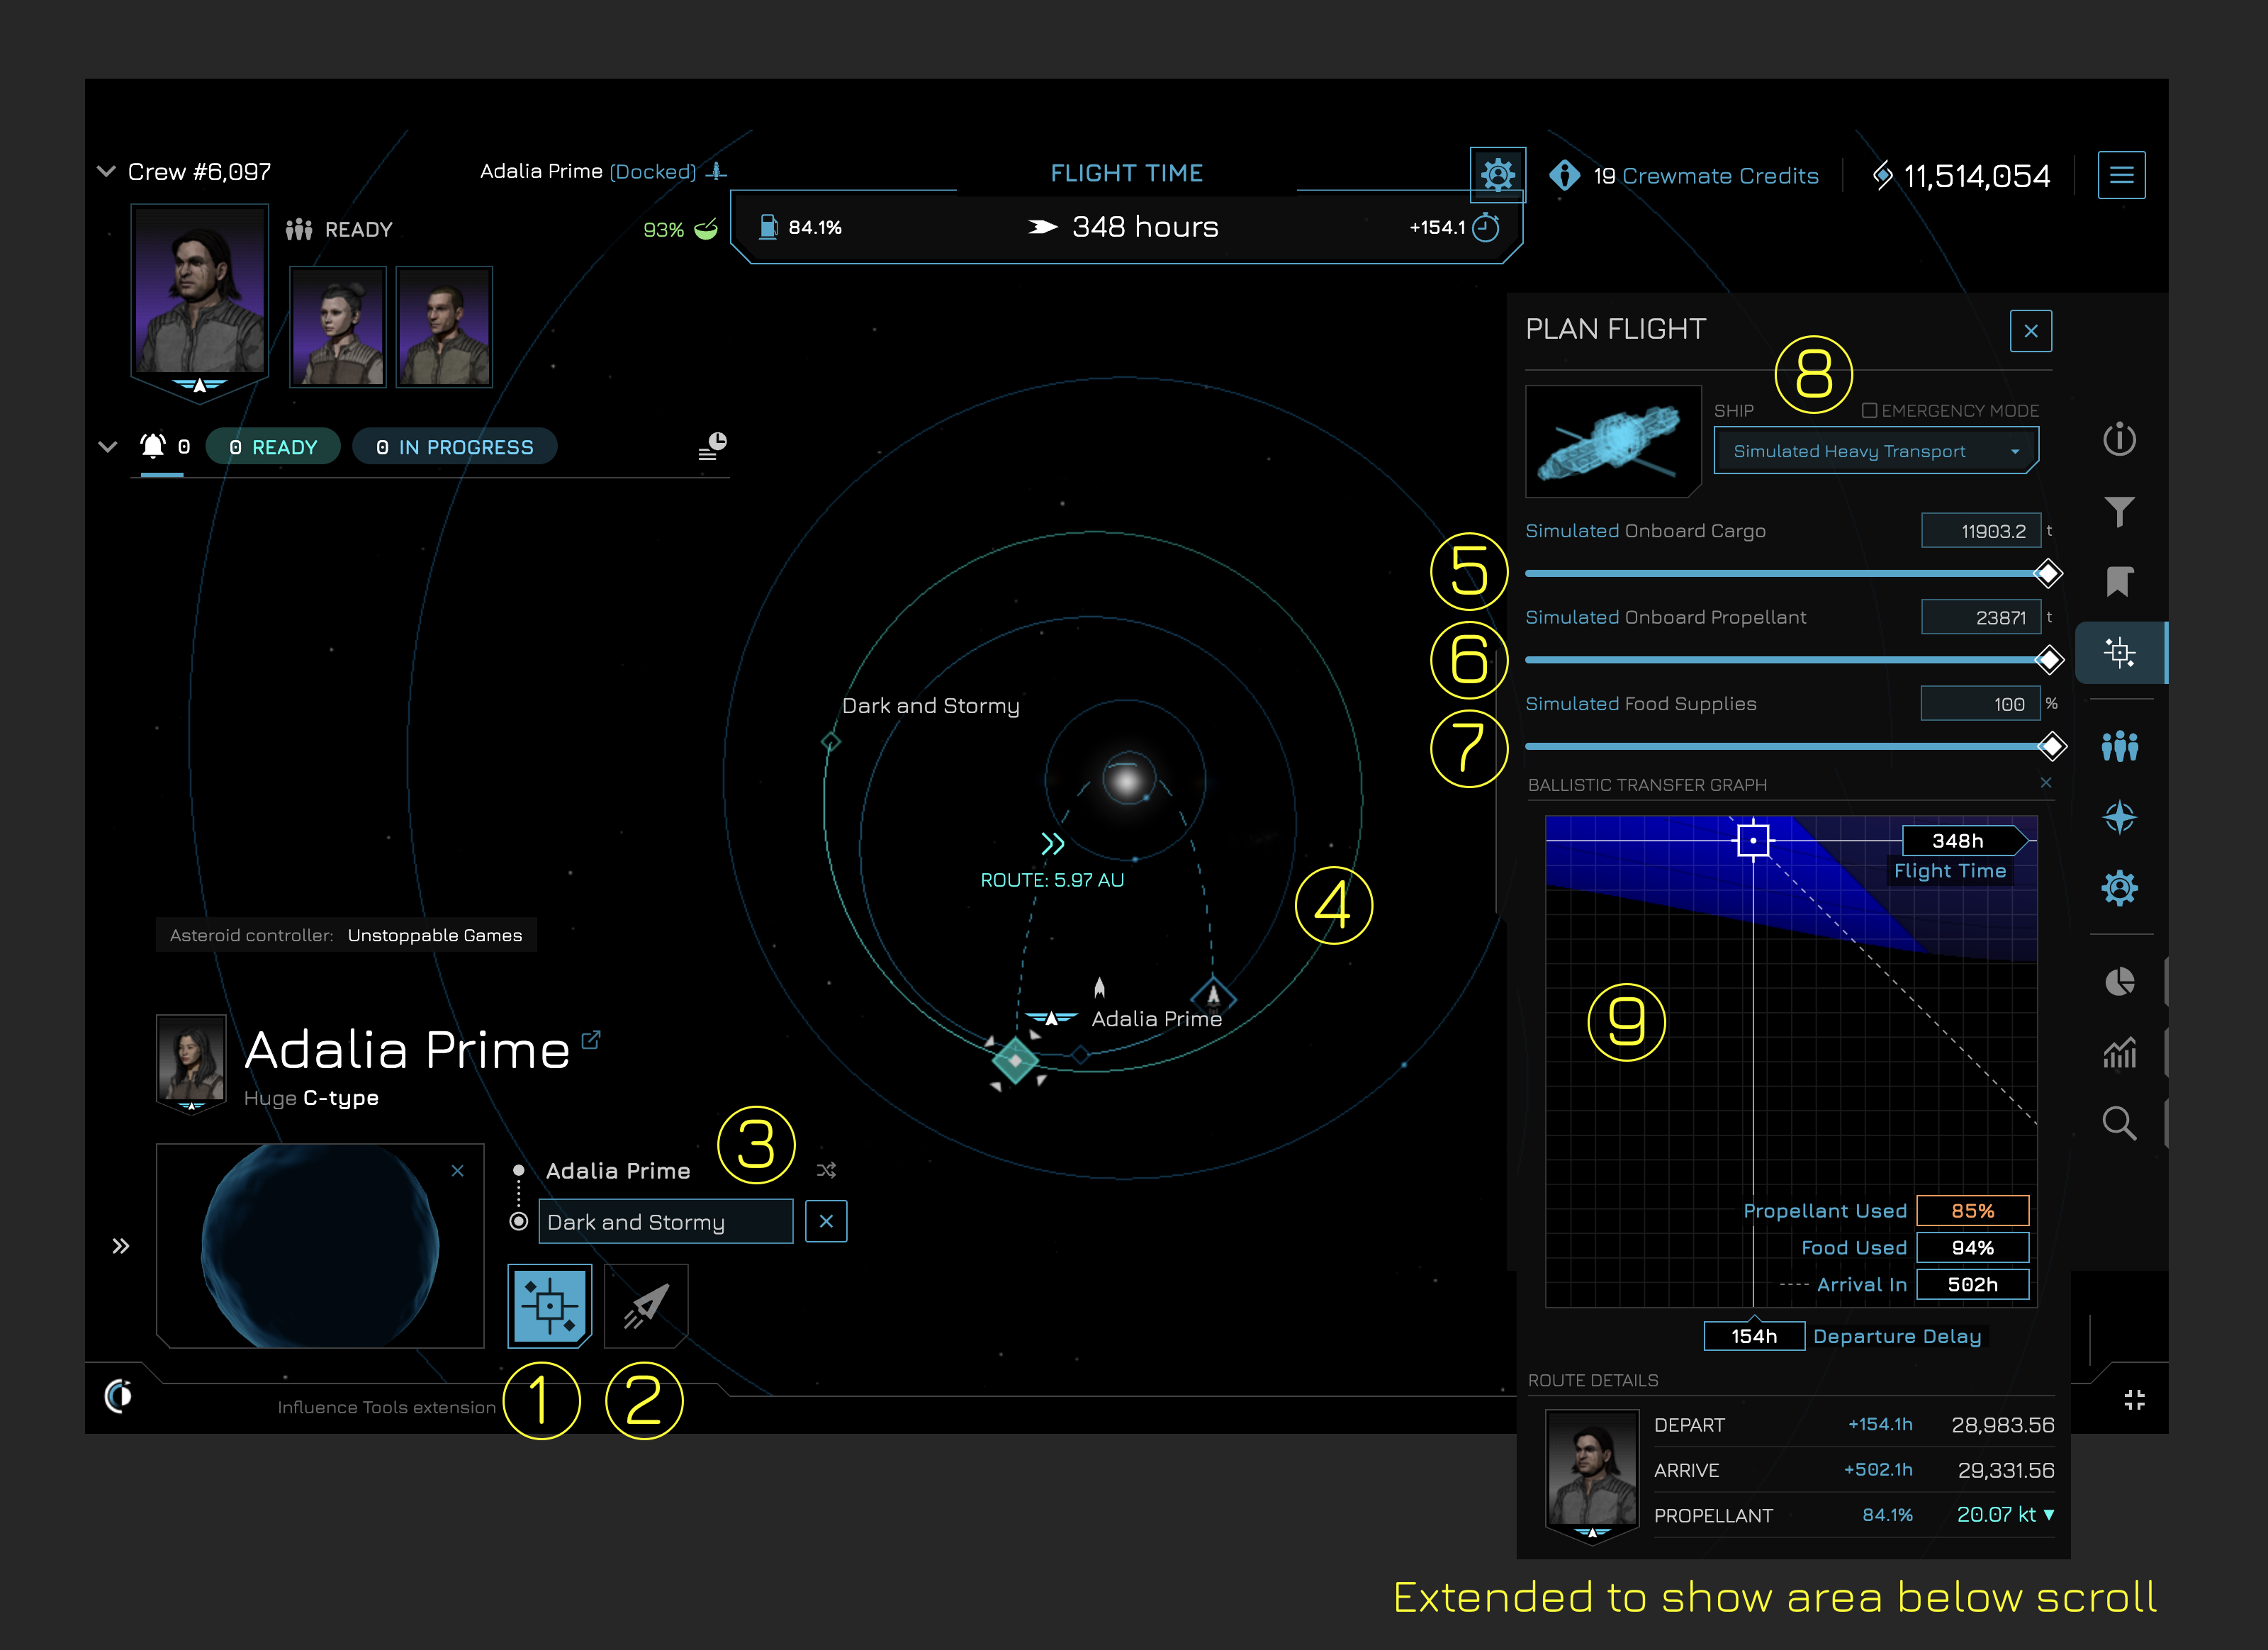
| # | Action Name | Description |
|---|---|---|
| 1 | Simulate Flight Plan | Opens the flight planning interface |
| 2 | Set Course | Starts a flight once a course is set |
| 3 | Destination Selector | Allows user to input destination asteroid |
| 4 | Course Preview | Shows the course your ship will travel |
| 5 | Onboard Cargo | Showcases or simualtes onboard cargo |
| 6 | Onboard Propellant | Showcases or simualtes onboard propellant |
| 7 | Food Supplies | Showcases or simualtes crew food stores |
| 8 | Ship Selector | Allows for selection of ship to simulate flight plan |
| 9 | Ballistic Transfer Graph | showcases available routes and allows for selection of course |
¶ Plan Flight
Once a destination is set (3), players are able to then select a ship (8) to simulate their course.
If a “Simulated” ship is selected, the player can adjust the sliders of the cargo (5), propellant (6), and food (7).
From there your ship will showcase the available routes in the Ballistic Transfer Graph (9).
Once a course is selected the player will see:
- Flight time (hours) indicating how many hours of in flight time
- Propellant used (percentage of onboard propellant)
- Food Used
- Arrival in (hours)
- Depature Delay (Time in hours until you would leave) this is manual, setting course does not wait for depature time, so you need to note this down
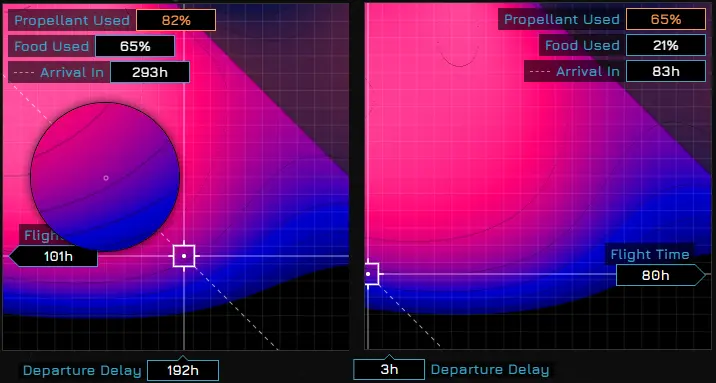
¶ Reading the chart Ballistic Transfer Graph (AKA “Porkchop Plot”)
- X axis is how long your ship delays in orbit before it leaves on its journey
- Y axis is how long your ship will travel on its transfer orbit after leaving
- So X + Y = the total time until arrival. Total time increases diagonally from the bottom left corner to the top right corner.
- The “greyed out” section in the upper right corner is unreachable because your Crew would run out of food.
- The colors display the needed delta-V for the trip represented by each point, relative to how much of your ship’s propellant would be needed:
- Black = more propellant than your ship has (can’t travel)
- Dark blue = ~100%
- Pink = ~50%
- White = ~0%
- If you want the fastest possible trip, pick the point on the chart that is diagonally closest to the lower left corner, which is not black.
- If you want the trip that uses the least propellant, pick the point on the chart with the brightest color on the blue->pink->white scale.
- Make sure to leave some propellant for the return trip! But keep in mind that the last 50% of your propellant is a lot more than 50% of your total delta-V, so you’ll need less propellant for the return trip, all other things being equal.

¶ Time adjustment
(found at the bottom right of the screen. Click the time to expand to see controls)

Adjusting the time will allow you to see flight plans for times in the future and past. This is mostly relevant to see when the best time to leave would be.
¶ Other Resources
- Extended travel guide created by the community
- Video guide on flying ships see below video tutorial